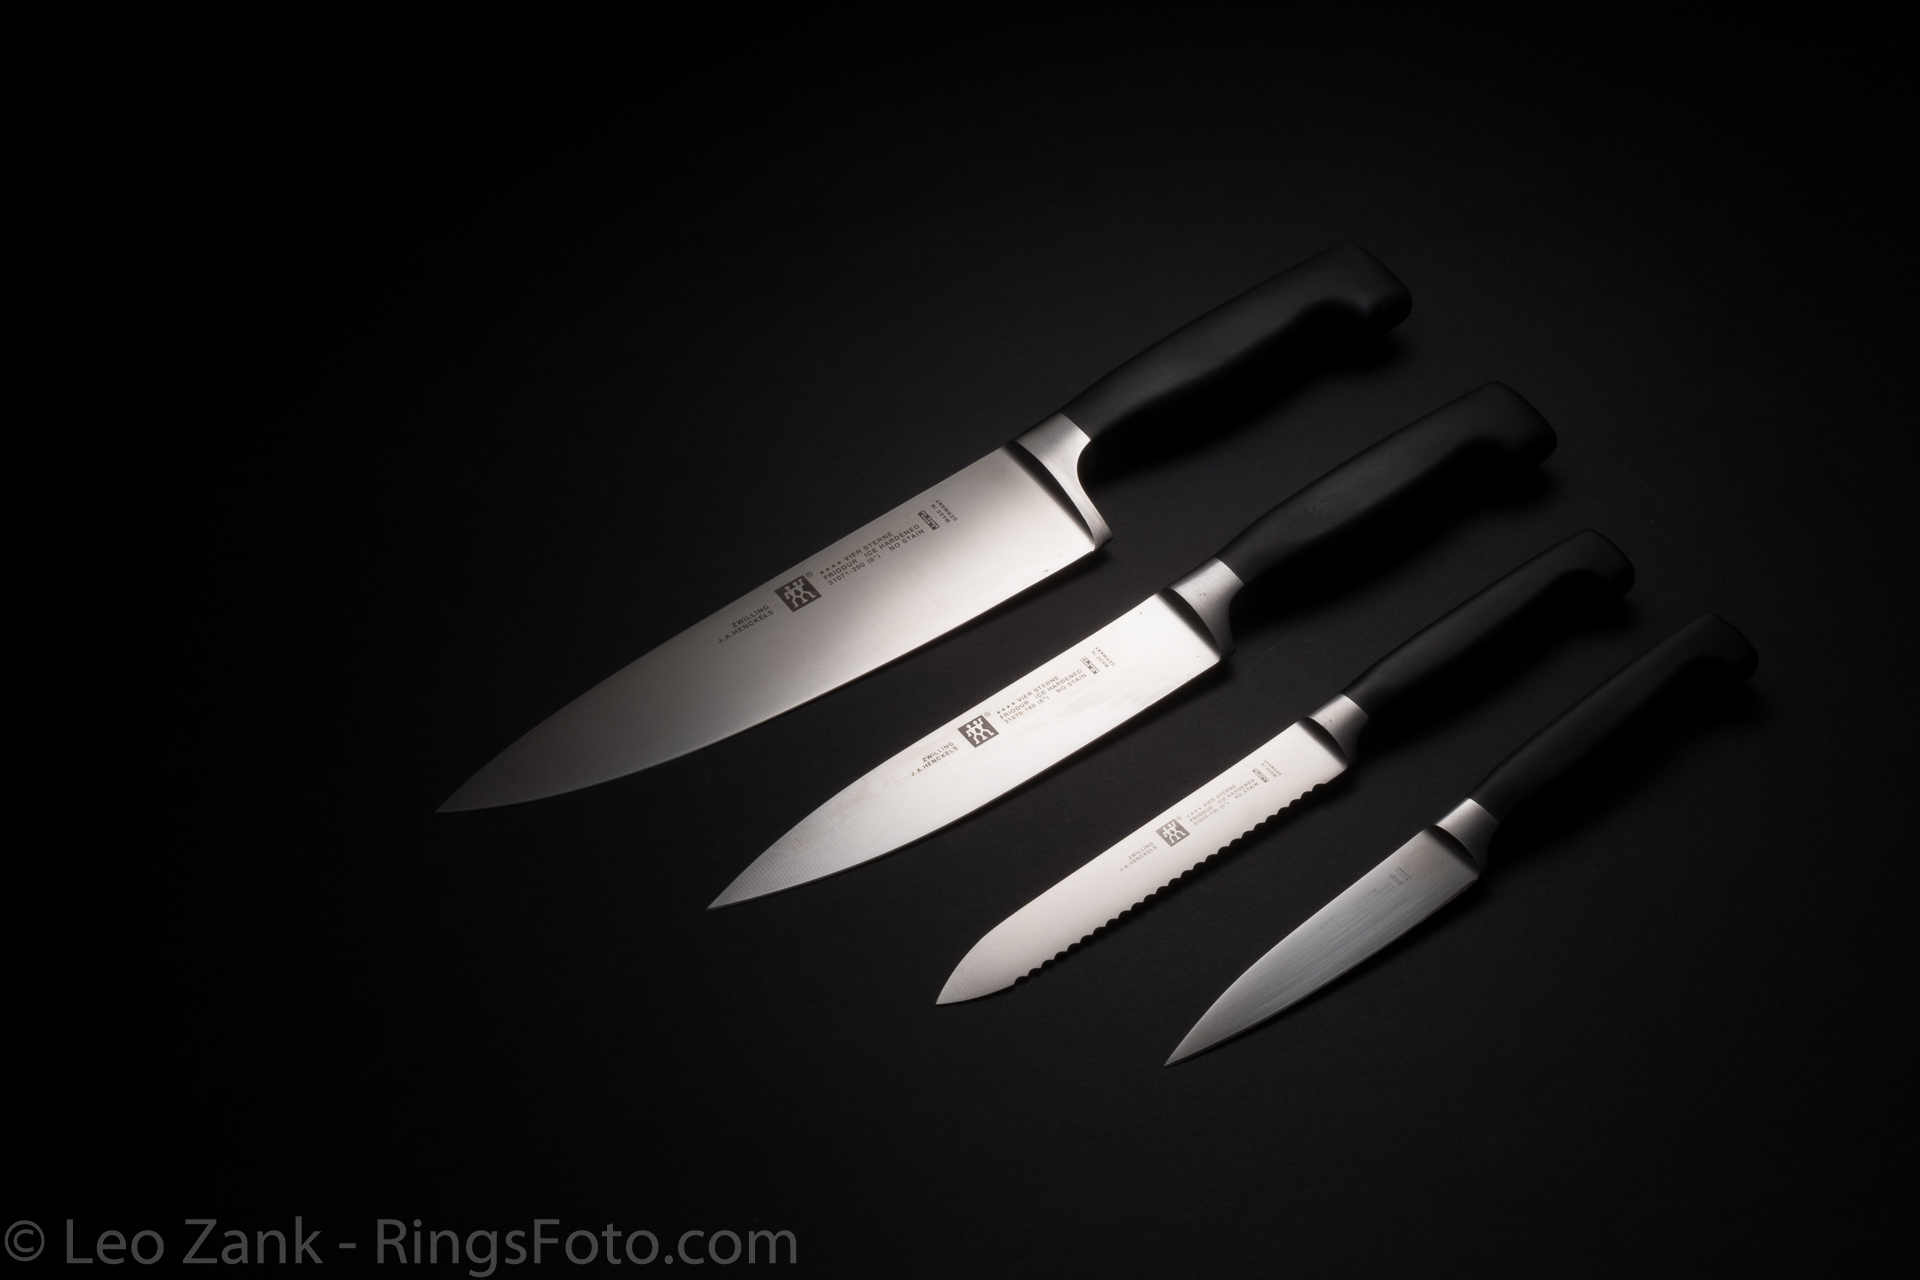
Be careful, extremely sharp
If you ever try to shoot shiny knives or forks and spoons you should understand that this could be a really tough challenge.
In my studio based in Hong Kong I do commercial photography of products. Today I will tell you of my setup for this kind of product photography - knives.
I love cooking. As any amateur chief I know that knife is a master on a kitchen. You use knives to cut, chop, peel and they should be always sharp and reliable instrument.
But shooting of such instruments with any camera will face a lot of problems: they are shiny, they are reflective, they have spots, especially if you are trying to shoot not new ones.
How to shoot professionally looking photos of such extremely difficult photographic subjects?
When you are looking at the final photo of my knives, you would never realize - how tough is this, especially if you did not try to do so.
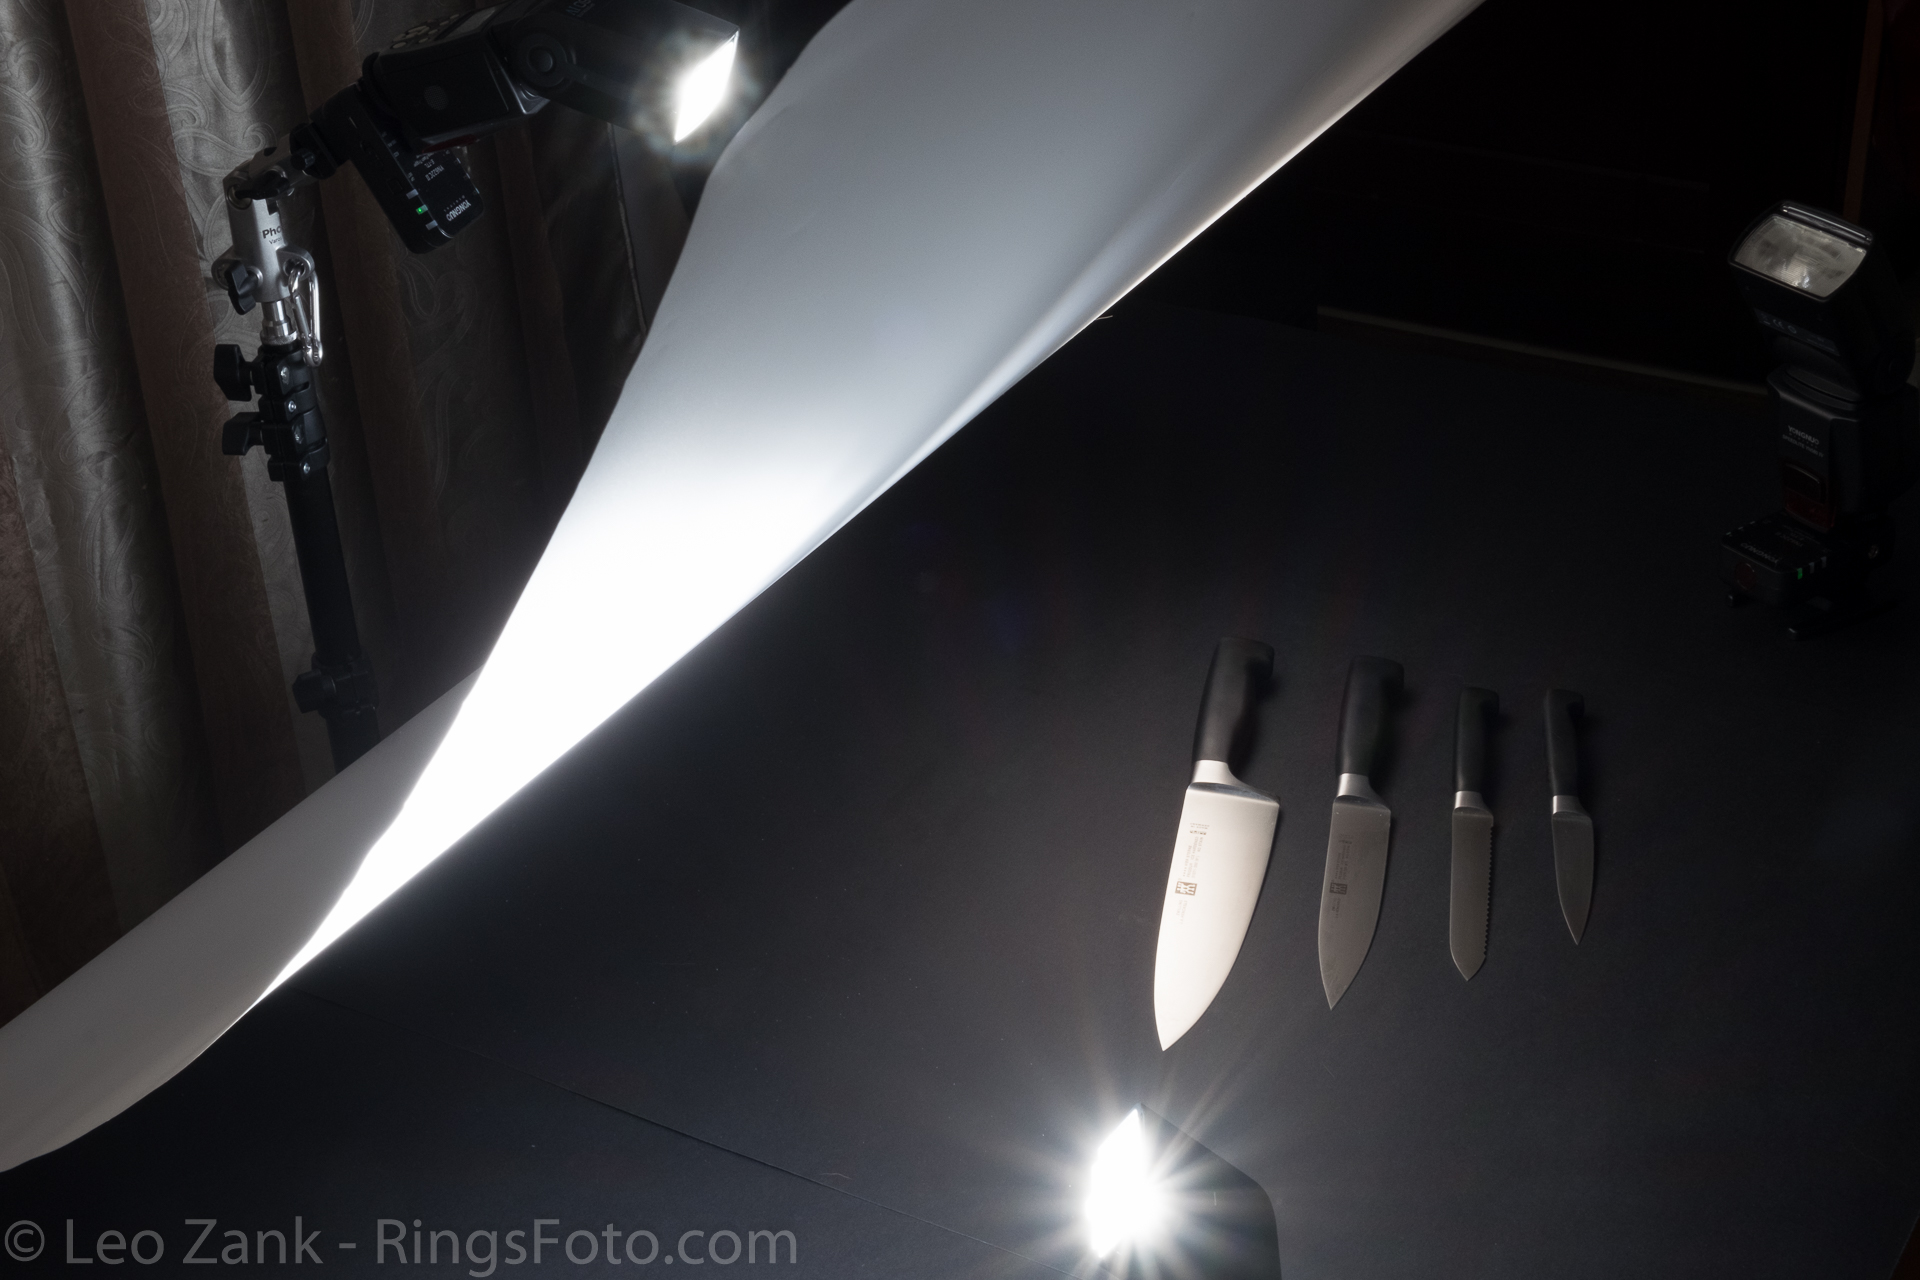
Let's look on a whole setup with resulting shot (this shot was not a final one, it is made just for explanation) and a brief explanation of setup first, then I will show how this setup works step by step till final image.
Click on images to enlarge.
You may see that we will need the following equipment:
1. Black background - I used just usual table with three pieces of thick black paper overlapping each other to cover whole surface of the table.
2. Subject of shooting: my favorite kitchen knives. Don't mention the brand - they are relaible and pretty sharp for my small kitchen.
3. Three sources of light: speedlights, one on the studio stand and two on the plastic foots which are included in flash box when you are purchasing one. I used two Yongnuo YN560-IV (manual flashes) and one Nissin i40 which is Fujifilm TTL flash. All flashes were in manual mode.
4. Four Yongnuo Wireless Flash Trigger Trancievers YN622C II - one as a transmitter mounted on my camera and three were connected to the hot shoes of the flashes. You can use any wireless triggers for flashes in manual mode. I know that YN560-IV has internal radio tranciever, but because I used one Nissin i40 flash, I was need to synchronise different flashes via same type of tranceivers.
5. Fujifilm X-E2 mounted on a tripod with XF18-55/F2.8-4.0 lens.
6. PVC diffusive screen both for diffuse the light of the main speedlight (which is from the back of setup), and for reflect the light from flashes to highlight some parts of the knives. PVC screen was fixed to the studio stand by clamps.
Despite of the fact that I made above shot from the hands, just to illustrate the process and made no post-processing for this image it looks very nice, even being transferred directly from the camera.
Let's now take a look on all the steps for this setup, so you will see how the light goes to the final image.
To demonstrate this I switched off all the flashes except main one, which is behind the PVC screen.
Click on images to enlarge.
As you can see the resulting shot (which I also made from hands) is already looking pretty good even with only modelling light.
Anyway we cannot see the details on the butts and edges of the knives - they are covered by shadows.
To light them up we need to add secondary source of light. Let's take a look on the result after I switched up second flash.
That is almost everything we need. Secondary light added highlights for edges and butts of the knives. Let's add third light and see almost the final result
Now we have everything to make the final shot. Here are the details for camera and flashes settings:
Camera - ISO 200 (minimum for Fujifilm X-E2), manual mode, 1/125 shutter speed, aperture F22 - to keep everything sharp.
Main flash (from the back) - 1/8 of the power, zoom - 105mm.
Secondary flash (from the left side) - 1/4 of the power, zoom - 24mm.
Tertiary flash (from the right side) - 1/8 of the power, zoom - 24mm.
Below you can see the settings I set up in Lightroom before exporting photograph to Photoshop for final post-processing.
I found some spots and defects on the resulting shot which I removed in Photoshop by frequency separation technique. Also I added sharpness and saturation to some parts of brand logos on the small knife which I'm using the most.
Here you can see the resulting shot before editing, photograph in the process of Photoshop treating and the final result which I personally like.
Hope that this explanation of the process will help you to improve your skills in still life or product photography.
If you have any comments or questions you can ask them on our Facebook Page. Also you can join our Facebook group.
Sincerely Yours, Leo Zank.
Tags: Commercial, Editing, Studio, Product


